Before I discuss the process of creating Dog Days of Summer, I want to dedicate the work to my grandpa, Papa Elmer. He was an amazing man who loved me dearly. When I began this class in college, he was very excited for me to try out welding. One of his hobbies was tinkering with and restoring old cars, so he was very familiar with metalworking. Unfortunately, Papa Elmer got sick and passed away before the project began. I know he would’ve loved to see it completed. I named this piece after the many times I visited my grandparents’ house, playing outside in their massive yard where my sibling and I would collect cicada shells. I miss Papa Elmer so much, but I’m glad I have such fond memories of him.
This project was made in two sections with two different processes and materials, one of which I had no experience in. Welding is something I never thought I would be doing. I was nervous about working with power tools, but as I continued, I began to enjoy it. Our goal was to create a wall-hanging armature out of steel rebar and sheet metal, which was then completed with weaving. The welding took a span of 21 days, though I didn’t work every day. Since it was a classroom setting, we a limited amount of tools. I worked maybe once or twice a week for 4-8 hours at a time. Grueling, but fun Below is a timeline of this piece’s progression.
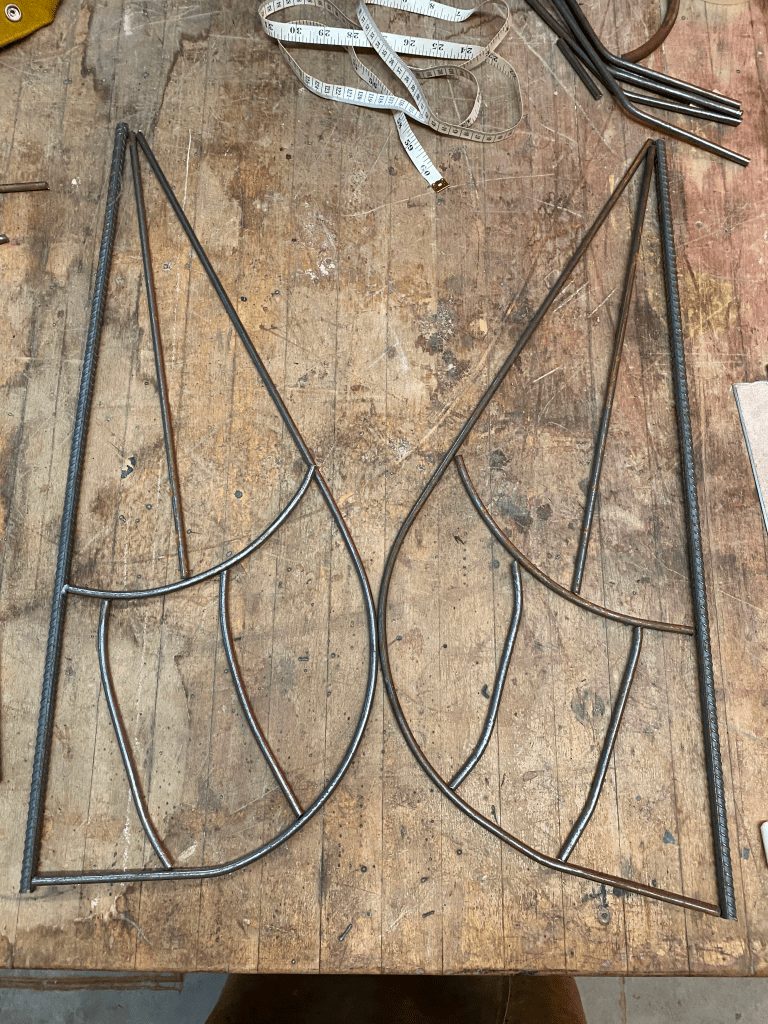
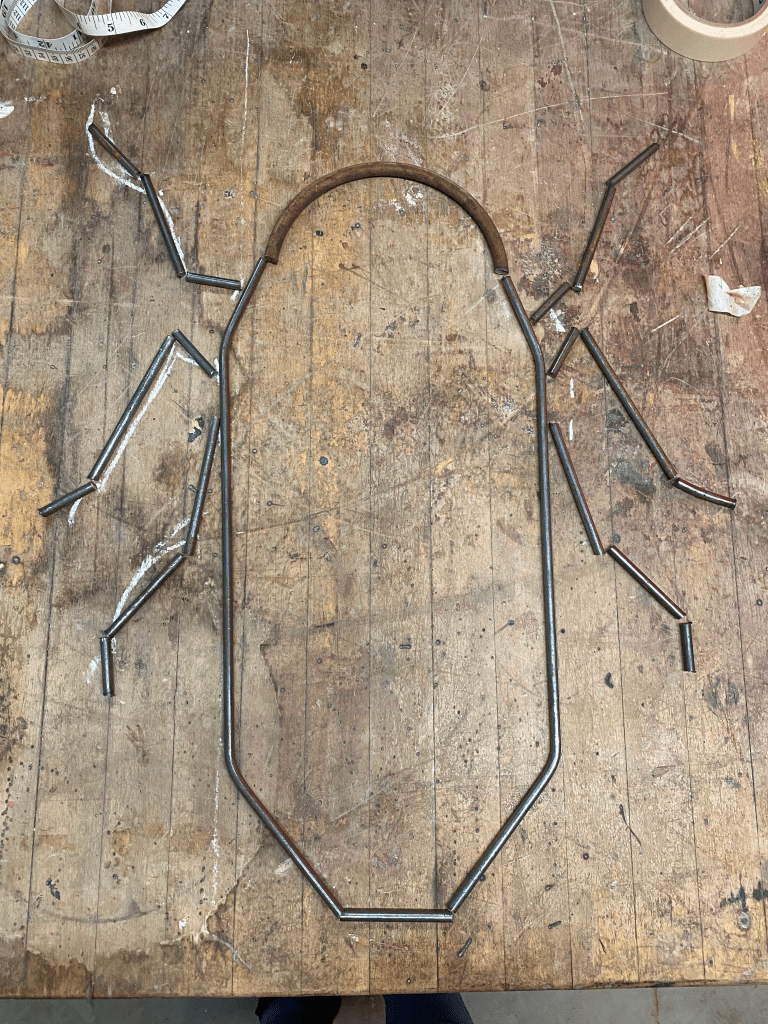
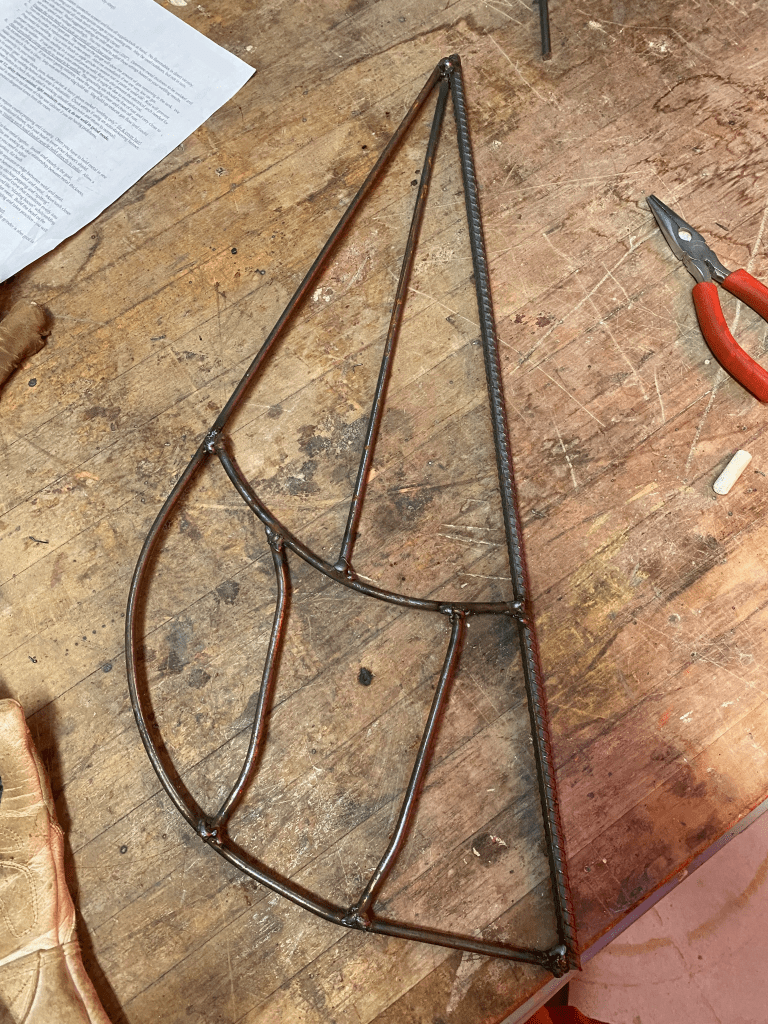
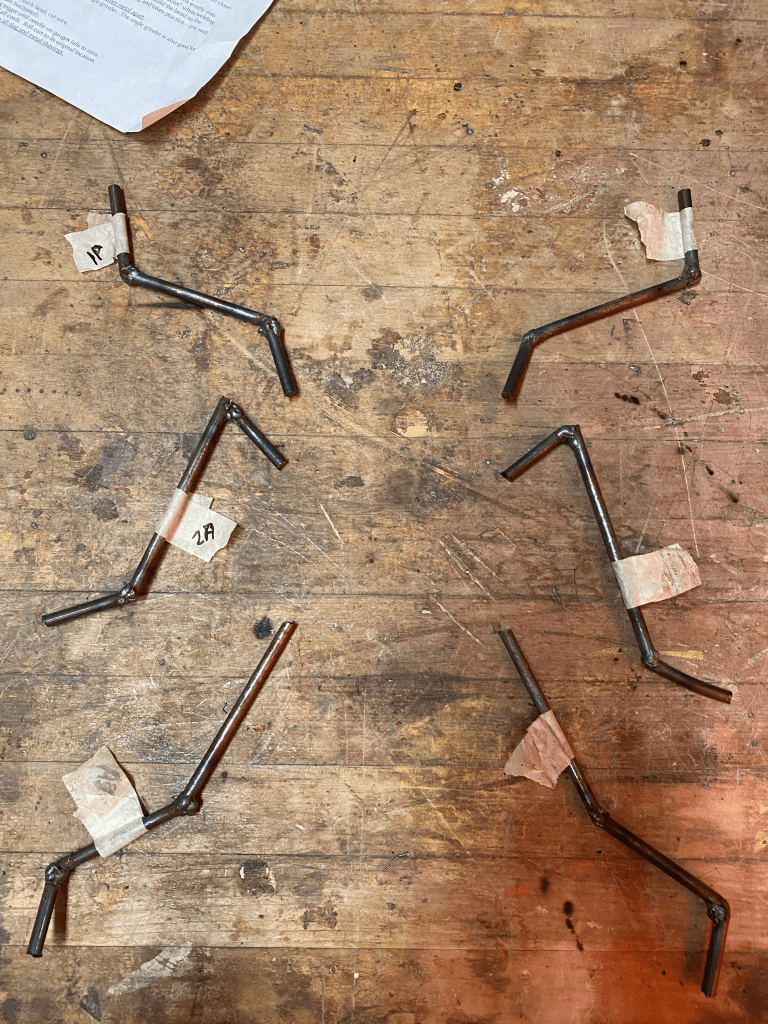
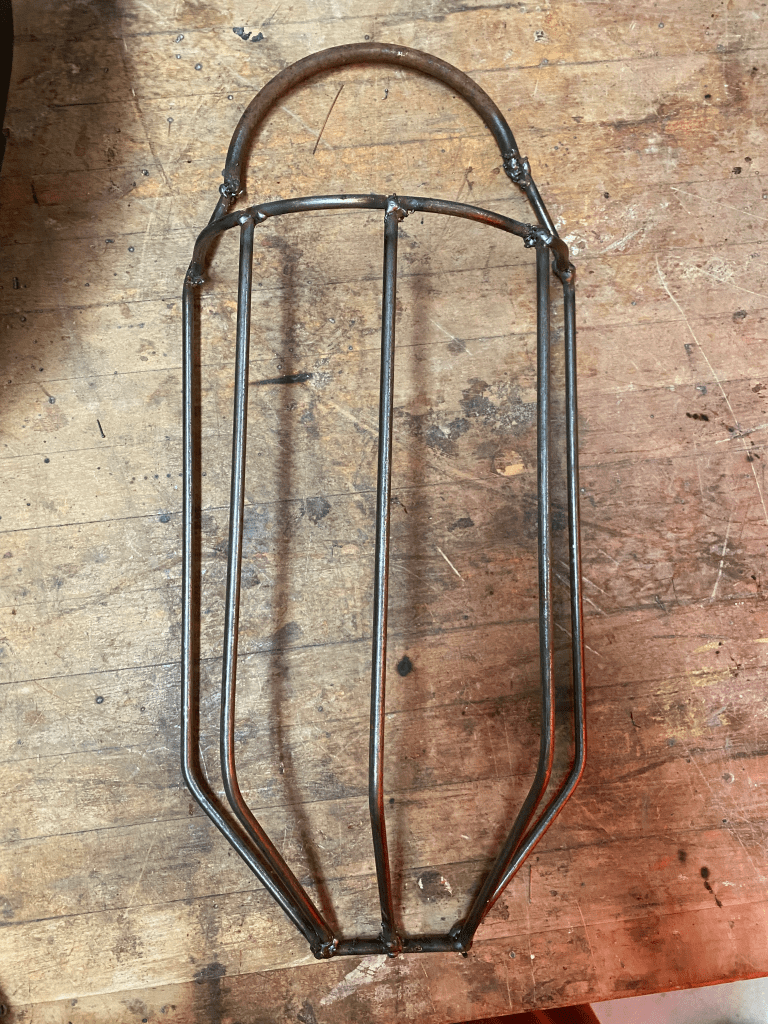
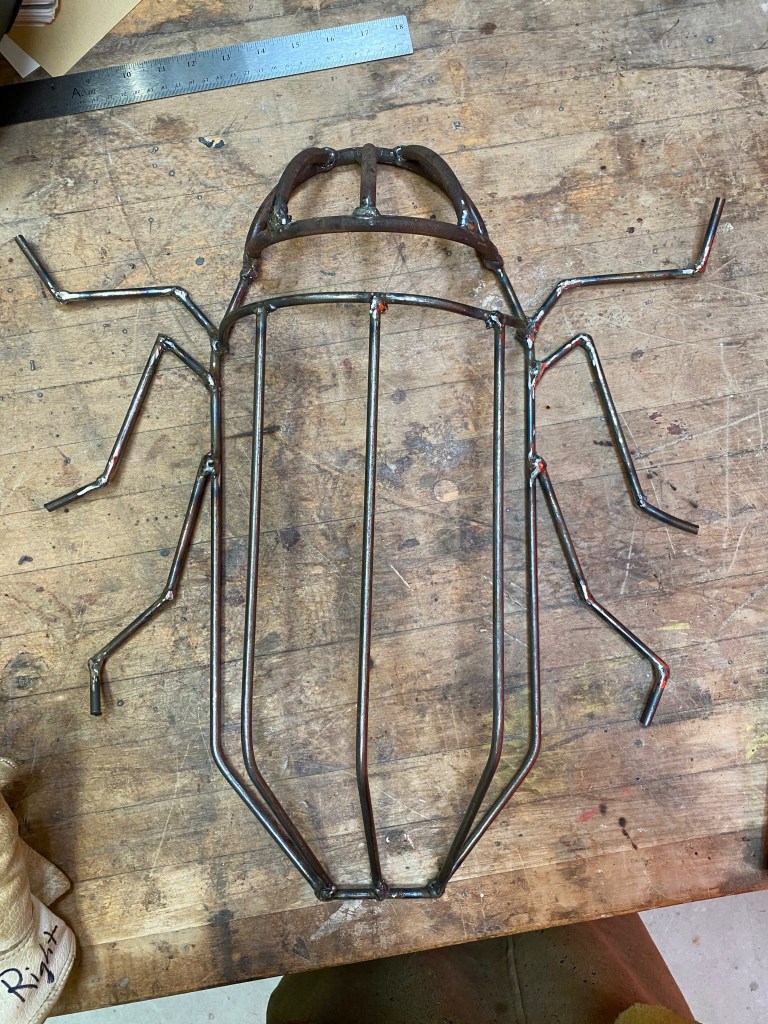
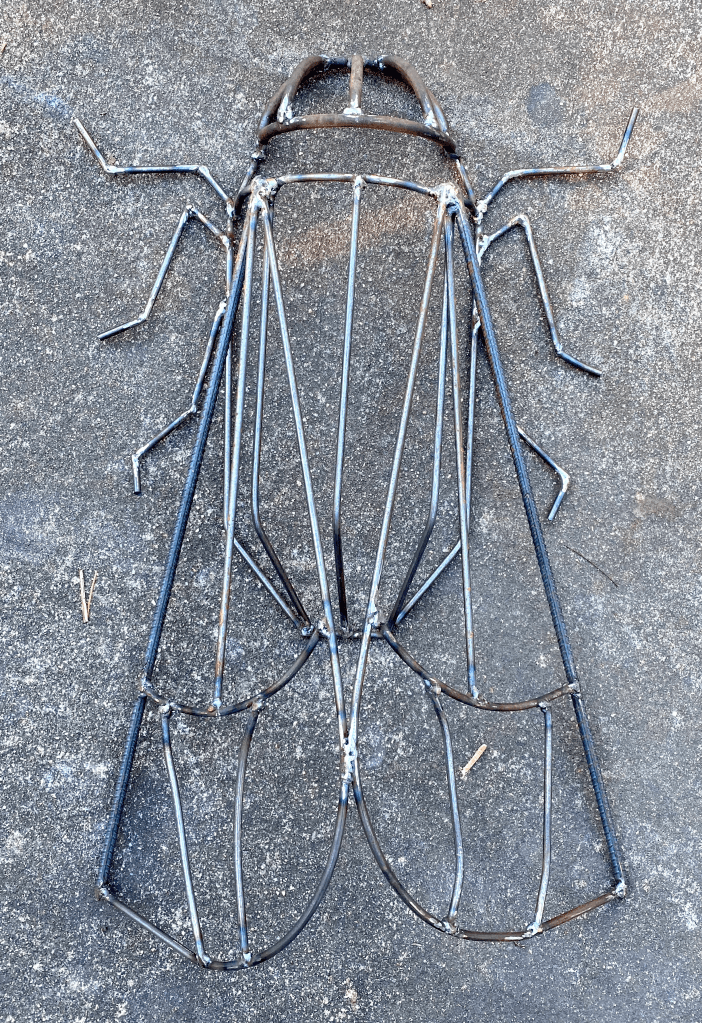
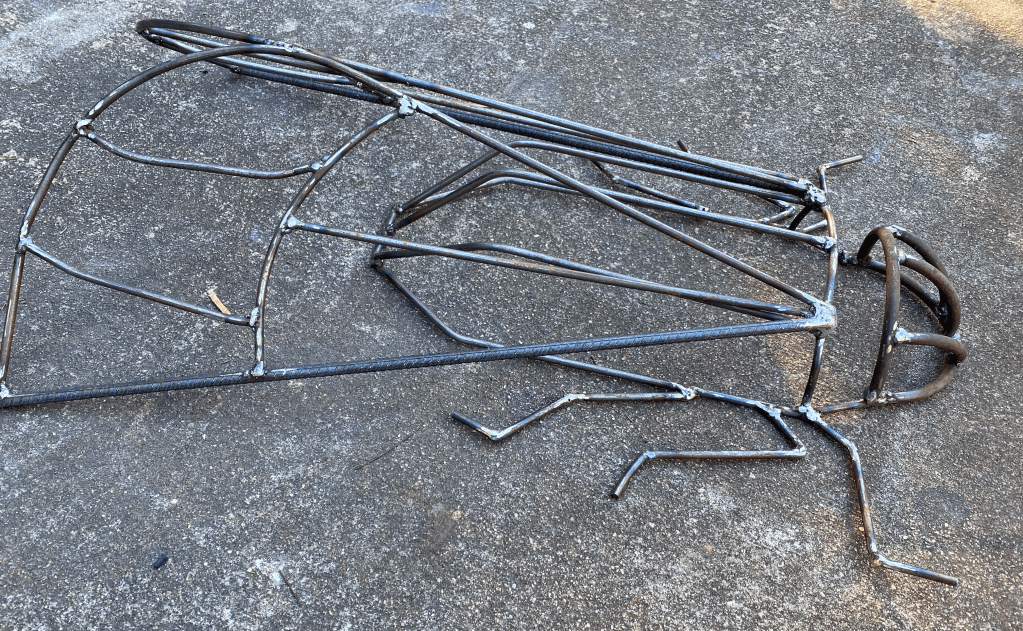
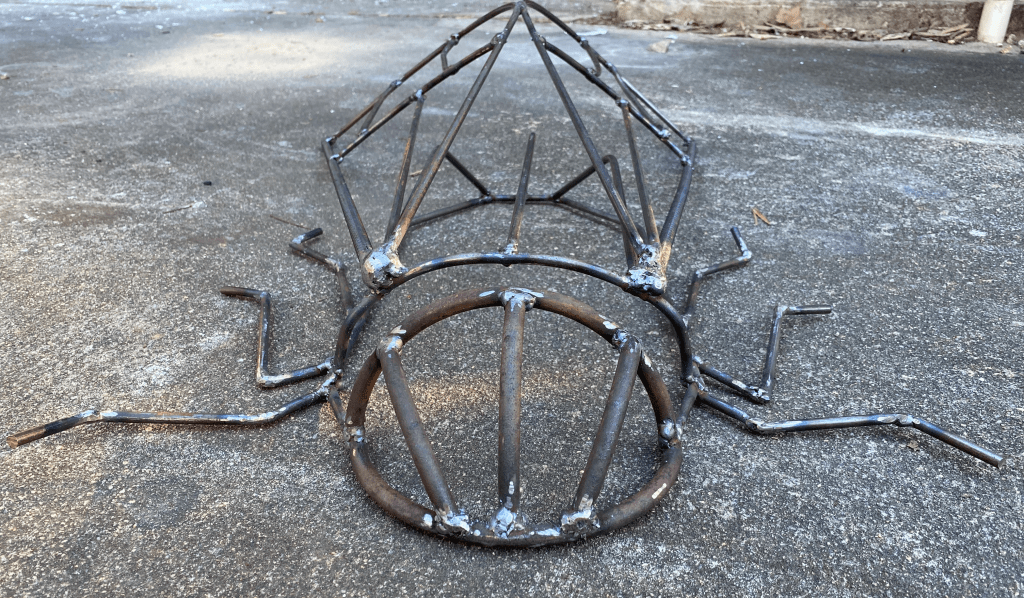
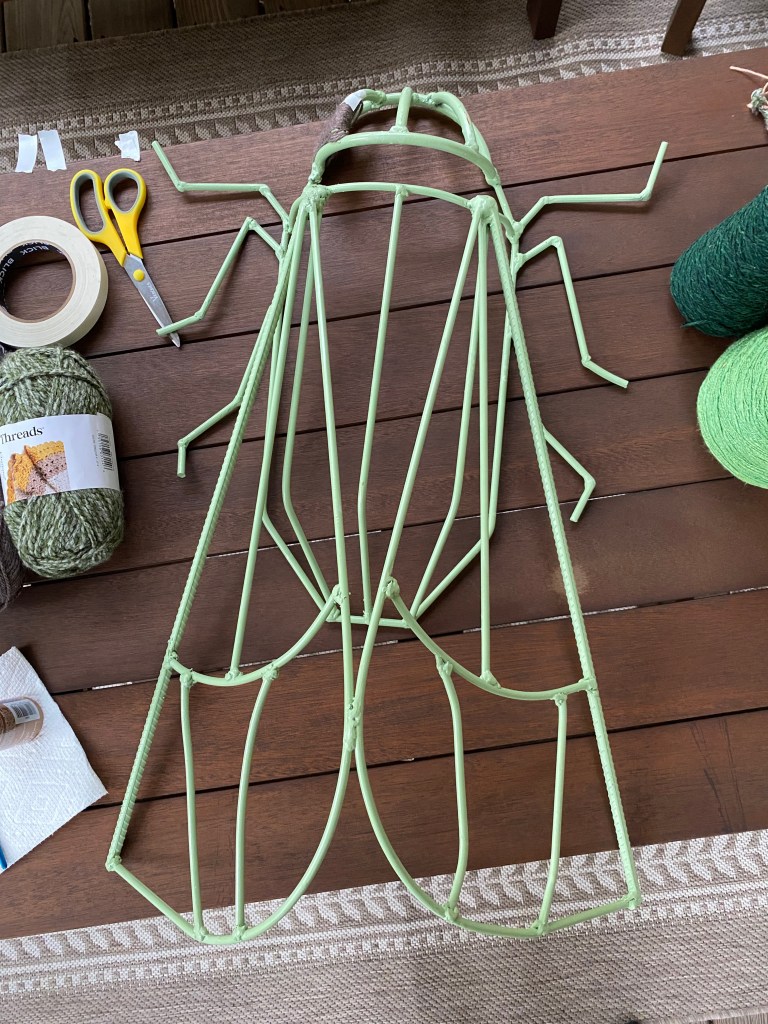
As always, I started with a sketch. Most of my sketches end up being more ambitious than what I can actually do, but that’s okayBoth wings before they were welded together. The thicker pieces of rebar make the outside edges of the wings, with the interior divisions being smaller gauge rebarThis is the majority of the body, before I added pieces to make it 3D. I like showing these images so that you can see the before and after of welding pieces togetherOne of the two wings, now welded together with a MIG welderAll six legs welded together and labeled for easy identification (there were a lot of bits to keep track of)The body receives the four pieces of rebar that make up its 3D form. Every piece of rebar was cut with an angle grinder. Some, like the body and rounded parts of the wings, were bent by hand. The head is made of pieces of a large steel coil, so I didn’t need to add the curve myself (thankfully)!Now, all of the body has been welded together. The head, like the body, has four pieces of rebar to make it 3D. In total, the body has 30 pieces of rebarWith the wings added, the rebar “skeleton” of the cicada is complete. Each wing has 6 pieces, which brings the total to 42 pieces of rebarHere it is from another angleYou can see the joins between each piece of rebar here. I did my best with an angle grinder to smooth out most of them, but the larger joins (like where the wings connect to the body) were too difficult to flatten completelyFinally, I spray-painted the body a light green. This was the end of the metalworking part of the project
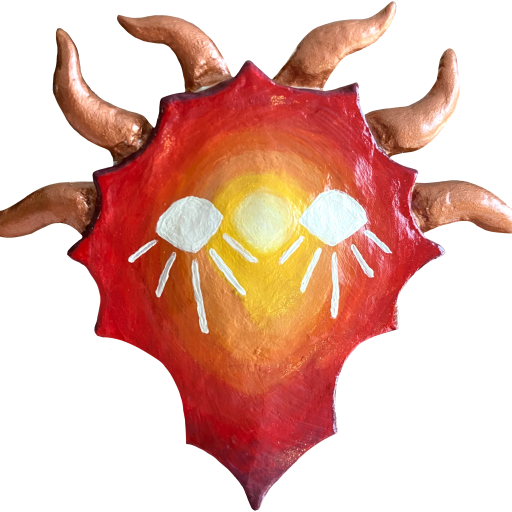
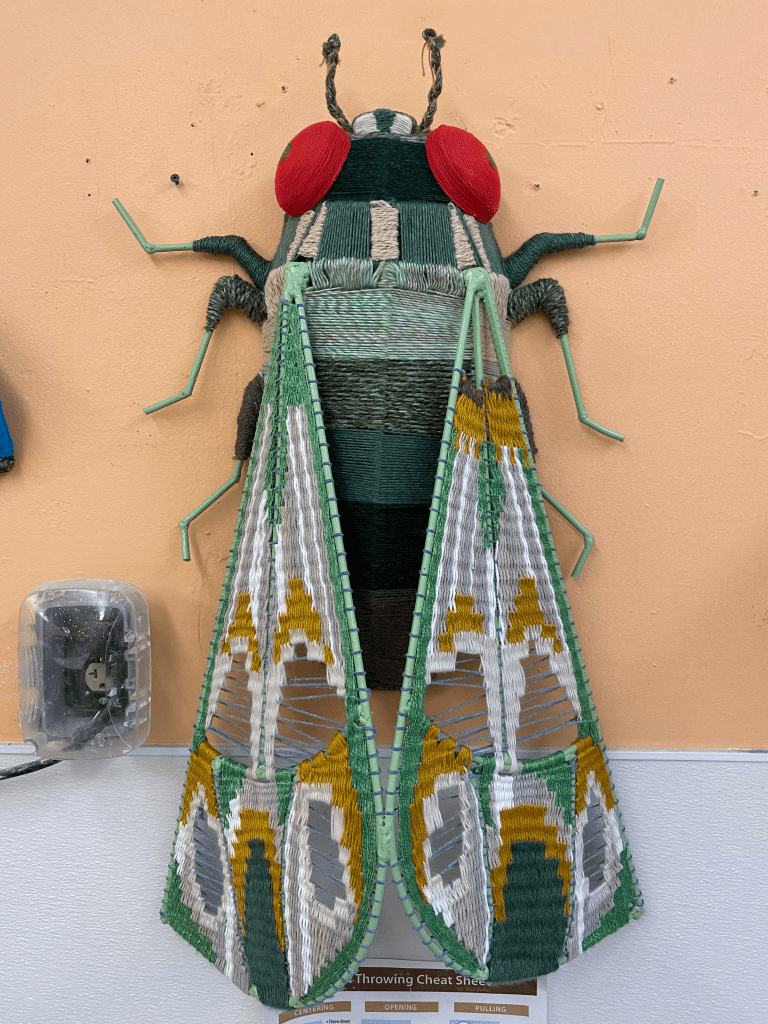
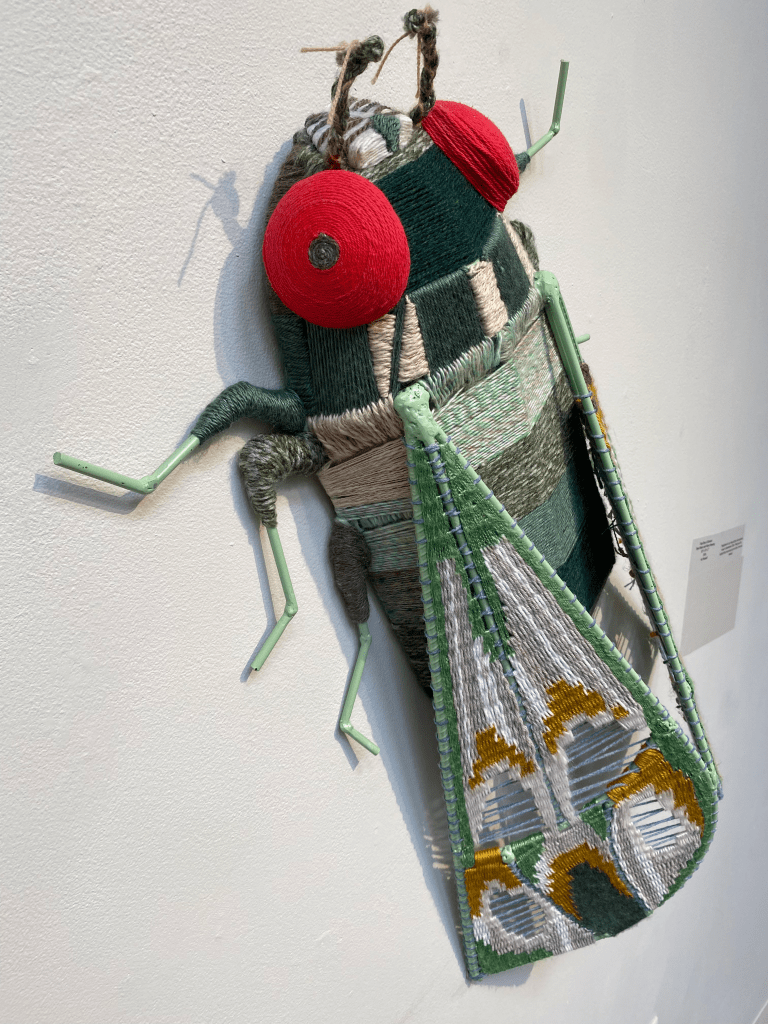
Before we move on to the weaving portion of the piece, here are the measurements for the cicada to hopefully give you a better idea of its scale. It is 30 inches in length (from head to wingtip), 19 inches in width (from each end of the legs), and 7 inches in height (measured to the top of the wings). It also weighs roughly 7.5 pounds. This is the largest wall-hanging artwork I’ve created so far. Weaving is the next step. I was a bit sad to cover up most of the rebar I welded together, but I had a vision that I wanted to execute. This process took me roughly a month, working after I got home from classes and on weekends. I had to keep it wrapped in a towel to keep my cats from chewing on it!
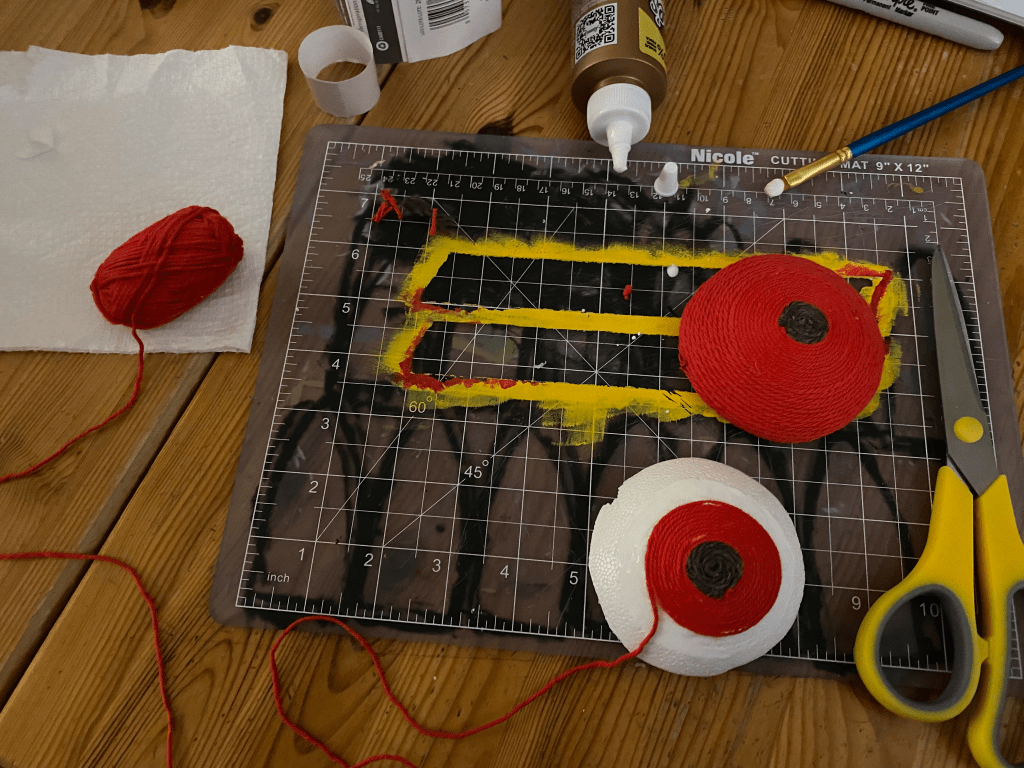
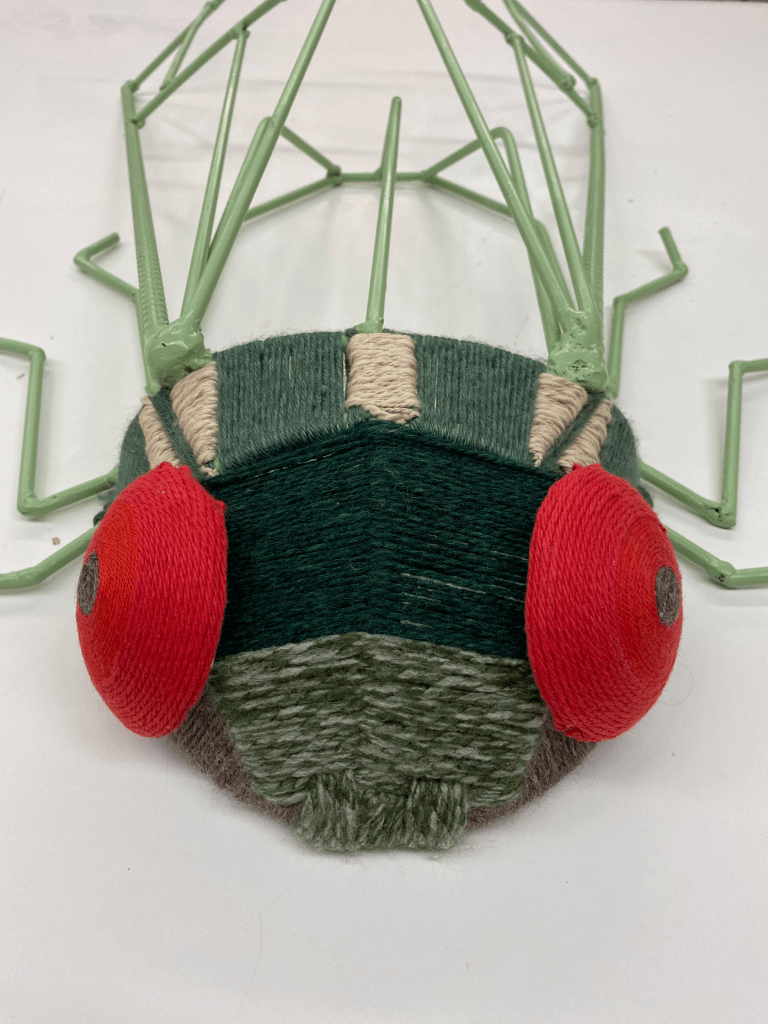
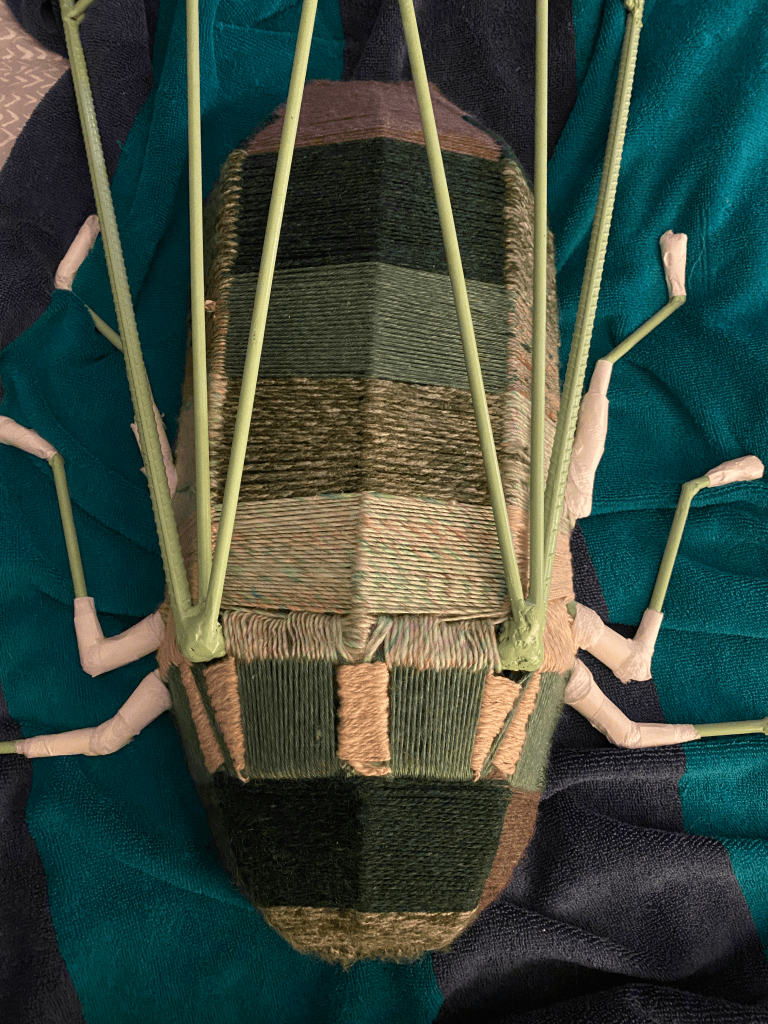
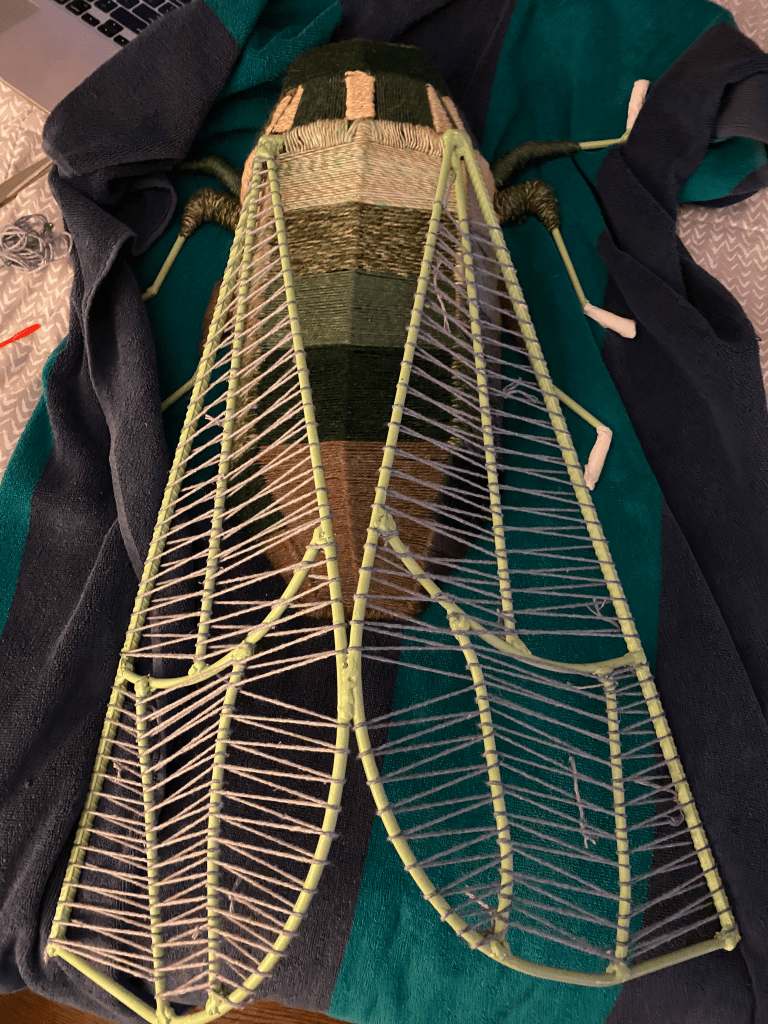
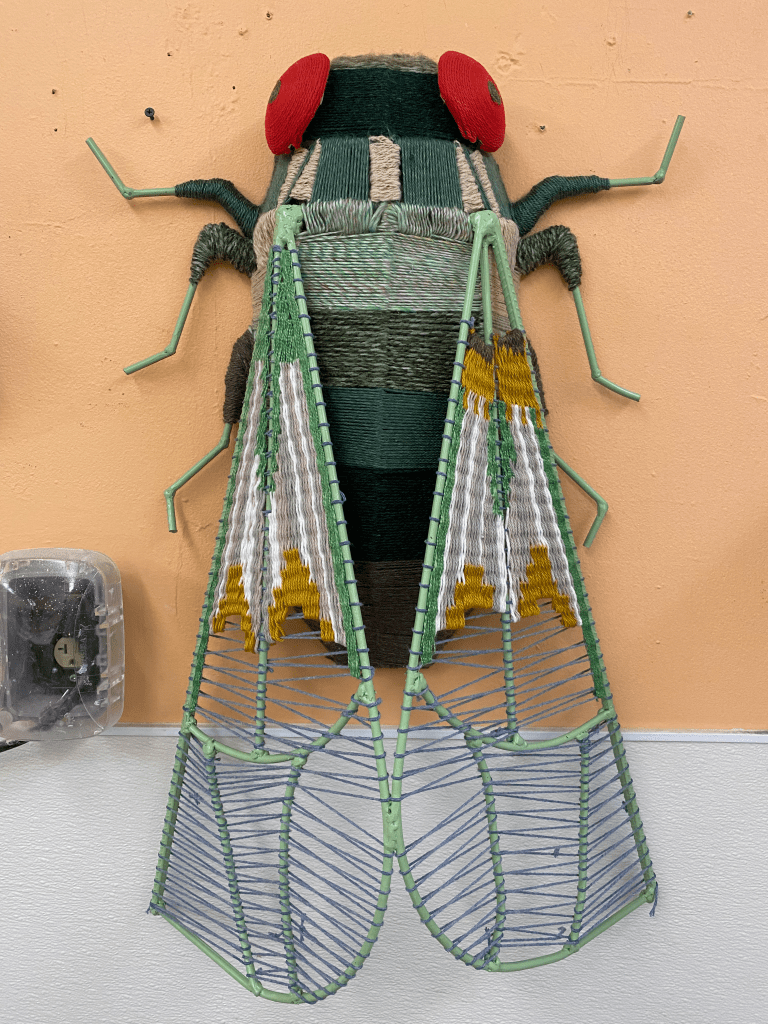
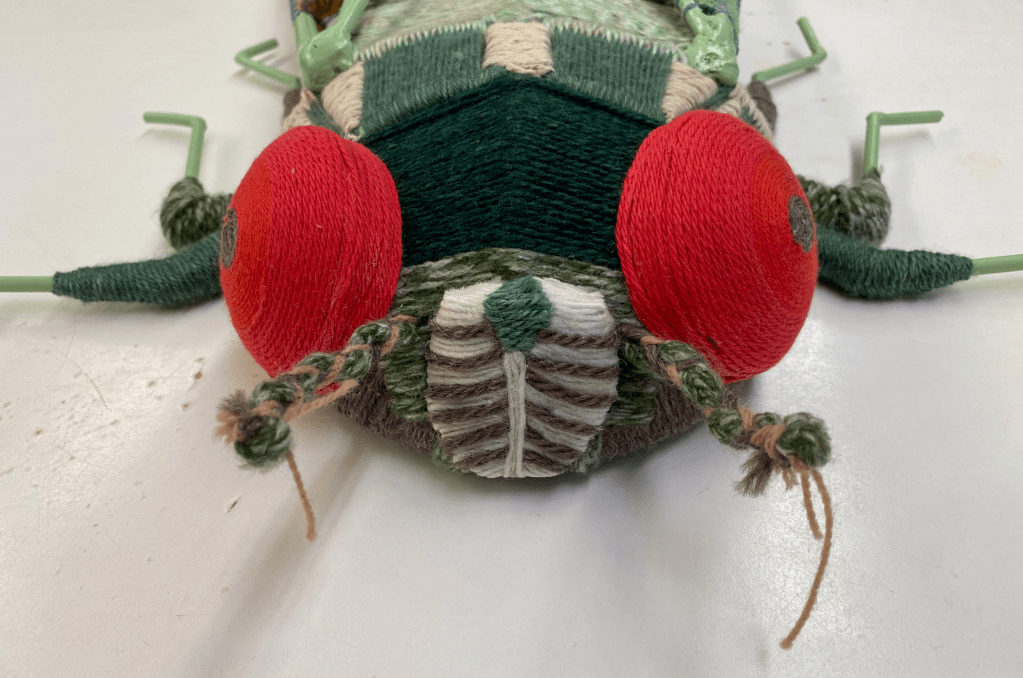
The creation process of the cicada’s famous eyes. I cut apart a styrofoam ball and wrapped it in yarnThe head of the cicada begins to take shape. Also, I lied a bit. The body is not woven, but rather each panel is wrapped with the desired yarn colorThe rest of the body is wrapped. I used paper towels to add bulk to the legs (and to create “boots” so the ends of the rebar wouldn’t cut me). And yes, I worked on my bed as it was the most comfortable for meAdding the warp to each wing panel probably took the longest. I had to pull each string taunt, add some glue to the frame, and hold it until the glue dried. Many times the warp slipped and I had to restart. This process was incredibly frustrating but was worthwhile in the endThe wings have half of the weaving complete. On the right wing, I was unable to add warp all the way up the wing like I had on the left. So I chose to add some asymmetry to the design to emphasize it rather than hide itAnd, at last, the other half is doneThe cicada is complete! It hung proudly at my senior exhibition in 2025A close-up on the face. I wanted to capture the unique features: the large eyes, the two short antennae, and the mouth part (a clypeus) that I lovingly refer to as a “car grille”. I love how my guy turned out!